Established in 1893, Maytag has consistently remained at the forefront of electrical appliance innovation. The company boasts a renowned portfolio of reliable products, including washers, dryers, and refrigerators.
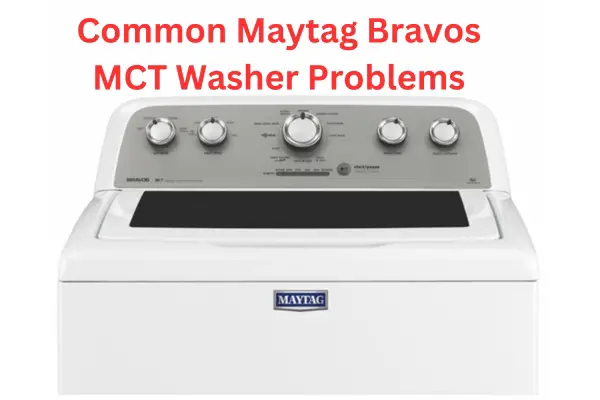
The Maytag Bravos MCT (Maytag Commercial Technology) washer is generally reliable, but it can run into a few problems occasionally. These include issues like not starting, problems with washing and rinsing, filling and draining trouble, sensor glitches, stopping in the middle of a cycle, and struggles with drying clothes.
Most of these problems can be resolved without needing a professional’s help, but you might have to seek expert assistance. I’ve compiled this blog to help you grasp these issues and provide straightforward fixes.
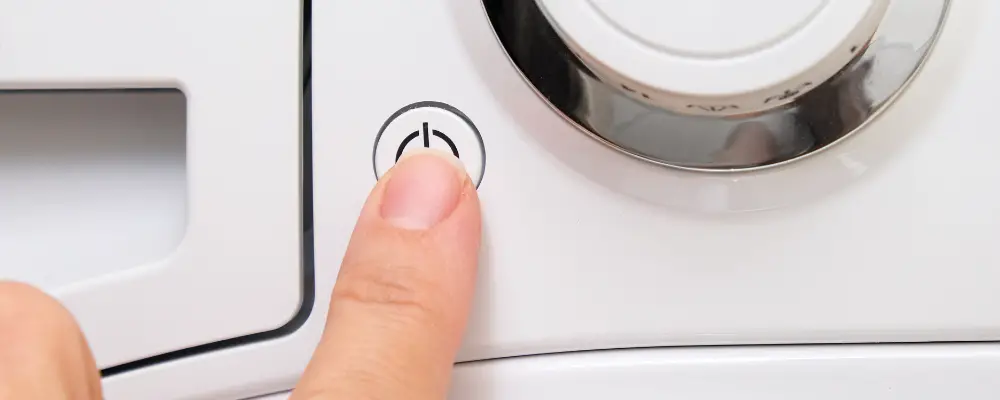
Before you proceed to fixes, I recommend you reset your Maytag Bravos washer because, many times, it fixes the problem. To reset, first ensure the drum is empty, and the lid is closed. Put the machine in standby mode. Then, turn the knob counterclockwise once, followed by three clockwise turns, one more counterclockwise turn, and finally one clockwise turn. After doing this, press the start button.
Quick Troubleshooting Guide
Before we jump into details, let’s have a quick summary of common Maytag Bravos MCT washer problems and quick fixes.
| Issue | Causes | Quick Fixes |
|---|---|---|
| Difficulty Starting | Issues with the power supply or cord, a blown thermal fuse, a malfunctioning lid lock, or a main control unit | Examine the power source and cord connections. Check for tripped breakers or faulty cords or outlets. Replace a blown thermal fuse or a defective lid lock or main control if needed. |
| Wash and Rinse Problems | Clogged filters or low water pressure | Clean the filters and ensure proper water flow. |
| Agitation Failure | Problems with the agitate repair kit, drive belt, door lock, drive motor, motor coupling, agitator assembly, or control board | Replace the faulty component. |
| Filling and Draining Issues | Blocked pipes or drain problems | Inspect pipes, clear any clogs, and check the drain. |
| Sensor Malfunctions | Blockage or malfunction of sensors | Clean or replace sensors as necessary. |
| Mid-Cycle Interruptions | Overloading or unbalanced loads | Adjust the load size and ensure proper balance. |
| Inadequate Spin Speed | Laundry overload, defective lid, poor drainage, loose or malfunctioning drive belt, loose belts, or a faulty water level switch | Reduce the load, replace the faulty lid lock, unclog the drains, replace the defective drive belt, tighten loose bolts, or select the appropriate water level. |
| Drying Issues | Obstructed vents or problems with the heating element | Clear any vent obstructions and inspect the heating element. |
Maytag Bravos MCT Washer Problems [Explained]
Now that we’ve discussed the general issues, let’s take a closer look at each one.
1. Washer not Starting
The common reasons your Maytag Bravos washer not starting can be due to,
- Power Issues: like loose cords or tripped breakers.
- Door or Lid Problems: The door latch and lid switch must work correctly for the washer to start. If they’re damaged, the washer will not start.
- Control Panel Failure: A damaged control board, possibly due to water or power fuse failure, will prevent the washer from starting.
To fix this,
- Begin by confirming that the washer is securely plugged in and has a stable power source. Check for any loose or disconnected cords. If you suspect a circuit breaker is tripped, reset it to restore power to the washer.
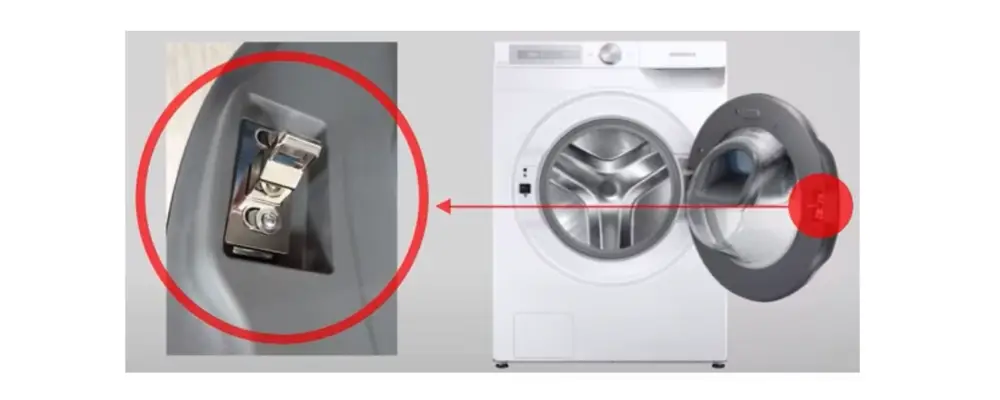
- Examine the door latch and lid switch closely. If you notice any physical damage or misalignment, consider replacing the faulty component.
- If you encounter an error code on the control panel, consult your washer’s user manual. Replace the electric fuse or the panel if they are damaged.
2. Wash and Rinse Problems
Inconsistent or inadequate washing and rinsing in your Maytag Bravos washer will lead to poor laundry results.
Failing to wash and rinse properly can be caused by,
- Clogged Detergent Dispensers: Detergent buildup can block proper detergent release during washing.
- Water Supply Issues: Inadequate water supply affects cleaning and rinsing.
- Faulty Water Inlet Valve
- Dirty or Damaged Wash Impellers: These agitate clothes during the wash; if they’re broken, cleaning won’t be effective.
To fix these issues,
- Clean Detergent Dispensers: Remove any residue or detergent buildup that may obstruct the dispensers. Always use the correct type and amount of detergent as the manufacturer recommends.
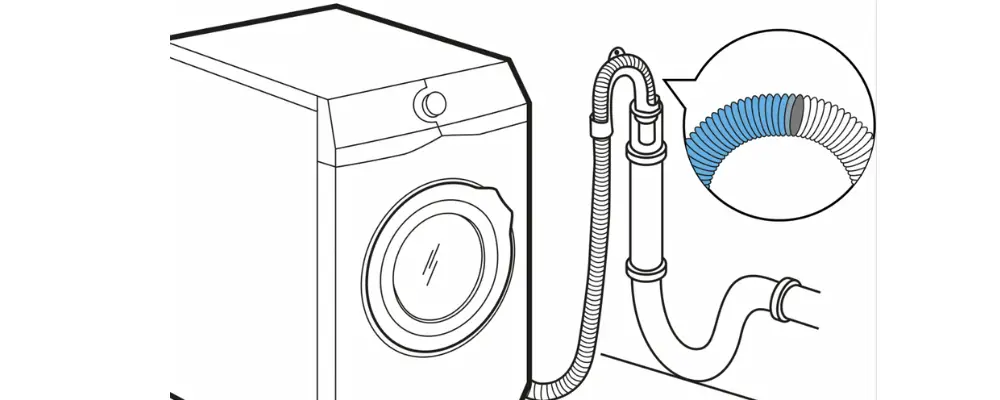
- Check Water Supply and Hoses: Ensure the water hoses are not kinked, damaged, or obstructed. Additionally, check and clean any filters in the water inlet valve to maintain a consistent and unobstructed water flow.
- Test and Replace Faulty Water Inlet Valves: If you suspect an issue with the water inlet valves, replace them with new, functioning valves.
- Inspect and Replace Wash Impellers: Check the condition of the wash impellers. If they are damaged, replace them.
3. Agitation Failure
Your Maytag MCT won’t agitate if any of the components below are faulty:
- Drive belt
- Drive motor or motor coupler
- Problems with the transmission
To fix these issues,
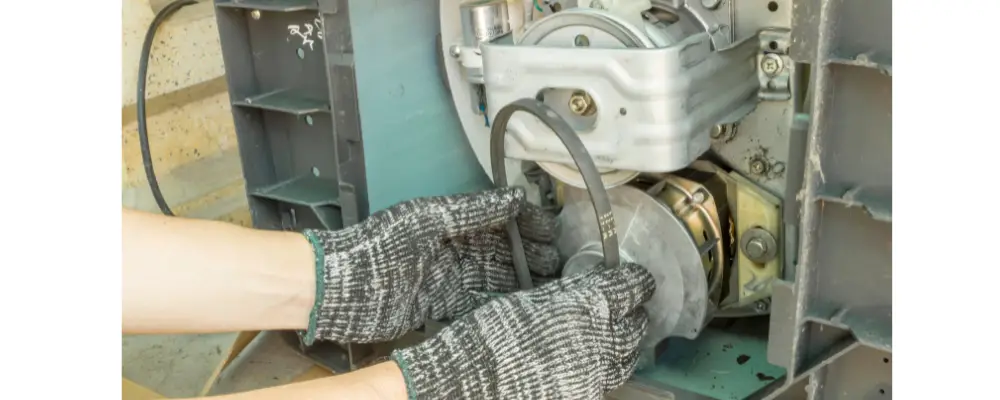
- Inspect and Replace a Worn or Broken Drive Belt: If it appears worn or broken, it’s essential to replace it. A new drive belt will help restore proper power transfer to the agitator.
- Check the Drive Motor and Motor Coupler: Examine the drive motor and motor coupler for any signs of malfunction. If you detect issues with these components, replace them.
- Transmission Issues: Problems with the transmission can be complex and typically require professional service. If you suspect issues with the transmission, it is recommended to contact a professional technician who can diagnose the problem and perform any necessary repairs.
4. Filling and Draining Issues
Proper water filling and draining are important for a smooth washing experience. If there is any problem with water filling or draining, you will end up with dirty clothes.
Causes,
- Clogged Inlet Hoses or Filters: Hoses and filters can get blocked, affecting water flow into the washer. This will impact filling and draining.
- Malfunctioning Water Level Switch: This switch controls water levels. If it doesn’t work right, it can lead to incorrect water levels during washing and rinsing.
- Drain Pump or Hose Problems: Problems with the pump or hose can block water drainage, causing the water not to drain correctly.
To fix these issues,
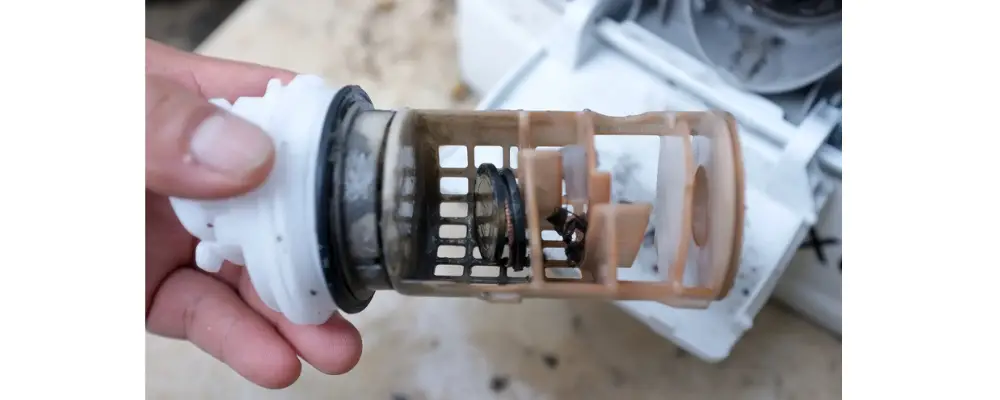
- Clear Any Clogs in the Inlet Hoses and Filters: Inspect the inlet hoses and filters. If you notice any obstructions or clogs, clear them to ensure an unobstructed water flow.
- Test and Replace a Faulty Water Level Switch: If you suspect the water level switch is malfunctioning, consider testing it to confirm the issue. If it malfunctions, replace it with a new one. This will help maintain the correct water levels during the cycles.
- Check the Drain Pump and Hose: Examine the drain pump and hose for any clogs, damage, or malfunctions. If you find any issues, consider replacing the affected components.
- Blocked Coin Trap: The coin trap, which traps foreign objects, must be clean to allow water to pass through. So, clean it.
5. Sensor Malfunctions
Sensor malfunctions can disrupt the proper detection of loads and affect the wash cycles needed to clean the clothes. Furthermore, it can also disrupt the drying process.

Here are a few reasons for this,
- Dirty or Damaged Load Sensors: Sensors that detect laundry amounts may not work right if dirty or damaged.
- Electrical or Connection Problems: Issues with electrical connections can mess with sensor function. Loose or damaged wiring can cause problems.
- Control Board Issues: The control board manages washer functions, including sensors. If it’s not working correctly, it affects sensor operation.
To fix this issue,
- Clean or Replace Load Sensors: If they are dirty or damaged, clean or consider replacing them, as necessary. Clean and functioning load sensors are essential for accurate load detection during wash cycles.
- Check Electrical Connections: Examine the electrical connections and wiring in your washer. Ensure that all connections are secure. Address any faults in the wiring to ensure proper sensor function.
- Inspect the Control Board: If you suspect control board issues, it’s advisable to inspect it for any malfunctions. A malfunctioning control board can result in sensor problems. If you identify problems with the control board, consult a professional technician for repair or replacement.
6. Mid-Cycle Interruptions
Sudden interruptions during a washing cycle can be really annoying. They can also make you forget where you were in the process, which messes up the whole cleaning process.
Here are a few causes for mid-cycle interruptions,
- Power Fluctuations: Changes in power supply, like surges or outages, can make the washer pause or shut down during a cycle.
- Door Latch or Lid Switch Problems: If the door latch or lid switch is damaged or not working, the washer stops to avoid safety issues.
- Overloaded or Unbalanced Load: Too much laundry or an uneven load can cause the washer to stop mid-cycle to prevent damage.
To fix this,
- Use a Surge Protector: To protect your washer from power fluctuations, consider using a surge protector. A surge protector can help regulate the power supply and shield your washer from sudden voltage changes.
- Inspect and Repair or Replace the Door Latch or Lid Switch: Examine the door latch and lid switch for any visible damage or malfunctions. If you identify issues with these safety components, consider repairing or replacing them as necessary to ensure safe and uninterrupted washing cycles.
- Ensure Proper Load Balance and Avoid Overloading: Prevent mid-cycle interruptions due to load-related issues by ensuring that each load is properly balanced and not overloaded. Distribute the laundry evenly in the drum to maintain the washer’s stability and prevent imbalances.
7. Inadequate Spin Speed
The washer needs to spin at an appropriate speed according to load. When your washer fails to spin at the desired speed, it can result in clothes remaining wetter than expected or dirty clothes.

Here are a few reasons for issues with spin speed,
- Overloaded Washer: Putting too much laundry in the washer can make it hard to spin efficiently, straining its parts.
- Drive Belt Issues: If the drive belt is worn or broken, it can reduce the spinning efficiency because it transfers power during the spin cycle.
- Motor or Motor Coupler Problems: Problems with the motor or motor coupler can also lead to inadequate spinning, as they drive the spinning motion, and issues with them affect performance.
- Faulty water level switch
- Faulty lid
To fix this,
- Avoid Overloading the Washer: To allow for efficient spinning, avoid overloading the washer. Ensure that you distribute the laundry evenly in the drum and adhere to the recommended load capacity for your washer. This will prevent strain on the machine and improve spin efficiency.
- Inspect and Replace a Worn or Broken Drive Belt: Inspect the drive belt. If it appears worn or broken, it’s essential to replace it with a new, functioning drive belt. A properly working drive belt is crucial for efficient spinning.
- Check the Drive Motor and Motor Coupler: Examine the drive motor and motor coupler for any signs of malfunction. If you detect issues with these components, consider replacing them.
- Replace the Faulty Lid or Water Level Switch
8. Drying Issues
Encountering issues with the drying process, particularly in a washer-dryer combination unit, can be a source of frustration as it disrupts the seamless transition of garments from wet to dry state.

Here are a few reasons for this,
- Overloaded Dryer: Putting too much laundry in the dryer can slow down drying because there’s not enough room for proper airflow.
- Clogged Lint Filter or Exhaust Duct: A clogged lint filter or exhaust duct limits airflow, making it hard for the dryer to remove moisture quickly, causing longer drying times.
- Faulty Heating Element or Thermostat: Problems with the heating element or thermostat can disrupt temperature control during drying, resulting in inefficient drying.
To fix this,
- Avoid Overloading the Dryer: To improve drying efficiency, ensure you do not overload the dryer. Follow the manufacturer’s recommendations for load capacity, and give your laundry enough space to allow proper airflow within the drum.
- Clean the Lint Filter and Ensure a Clear Exhaust Duct: Regularly clean the lint filter before each drying cycle to prevent lint buildup. Additionally, inspect the exhaust duct to ensure it is clear of any obstructions. A clean and unobstructed duct will facilitate efficient moisture removal.
- Test and Replace a Faulty Heating Element or Thermostat: If you suspect issues with the heating element or thermostat, consider performing diagnostic tests to confirm the problem. If these components are faulty, replace them with new and functioning parts to restore proper heating and drying performance.